Page 6 - Deck and Interior Assembly
by Dennis Lancaster
On this Page:
On Other Pages on This Site:
Read my plans for this page
Rolling The Hull
The Cap Rail
Hull Painted
Foam Flotation
Hull Finishing
Site Contents -
The Project -
The Plans -
The Materials -
Bulkheads -
Keel and Ballast -
Winter Projects -
Mast Fabrication -
Putting The Hull Together -
Rigging the Old Shoe -
Sailing My Old Shoe -
Boat Building Links
e-mail to: oldshoe_1@hotmail.com
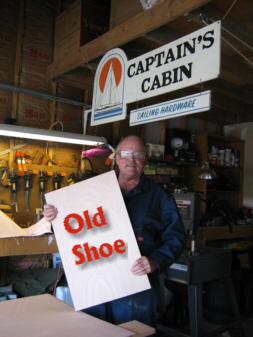
This page documents with text and photograhs what happemed as I flipped the hull and began to work on the deck and interior of my Old Shoe.
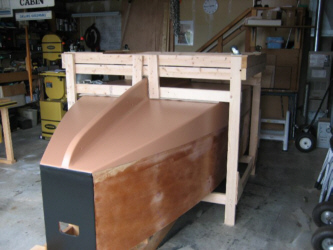
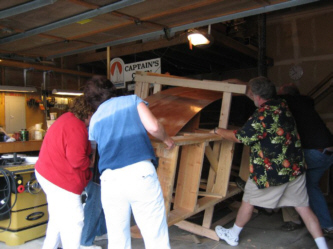
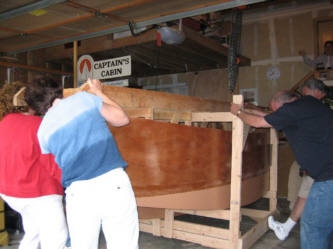
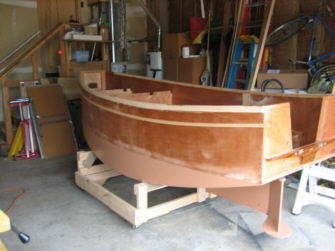
July 4, 2008. I completed the rolling frame and with the help of 12 good friends, rolled the hull. It was all over in about 6 mins. and went smoothly.
The next day, I removed the strongback and side supports to leave just the rolling cradle. I have completed adding both cap rails and the Port rub rail. The rub rail has been a challenge, as I needed to fabricate wood spacing and clamping jigs. I used Spruce for both the cap and rub rails and although this wood is stiff and strong, it does take the compound bending onto the hull without any splitting.
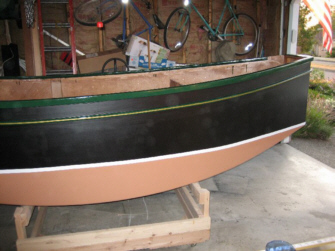
August 2008, finds the hull painted. I chose black with dark green trim, adding a gold pin strip down the rub rail (this replaces the brass quarter round I wanted to install on the rub rails). I chose a flat black paint from Benjamin Moore. It is close to Rust-o-leum in its properties and I'm hoping for some durability. The dark green is a Rust-o-leum marine grade paint, high gloss. I'm pleased with the look. I added a white waterline stripe, using marine waterline tape.
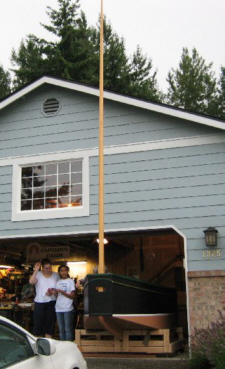
The mast support structure was completed and dry fitted, which gave me a chance to trial step the main mast. All went smoothly and she is perfectly aligned the first time out. Sure looks like a tall stick.
Work on the interior has started at the bow and will work back towards the stern. Many details ahead, as work progresses slowly. I am uncertain of an October completion. Might be next Spring when we finally splash the boat. Stay tuned.
By the way, I found it necessary to add tools along the way. So I have revised my list of tools on my "Project" page You will find a photo of these tools along with a bulleted list if you follow the link to that page.
My new tools added in 2008 are as follows: Powermatic 10" table saw with wood table extension, Powermatic 14" bandsaw, Powermatic 6" Jointer, Grizzly drill press, Grizzly dust collector, Porter Cable 690 router and table, Milwalkee right angle grinder, Porter cable belt sander and 16 new clamps, plus an assortment of new drills and Forsener bits.
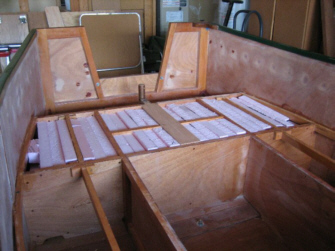
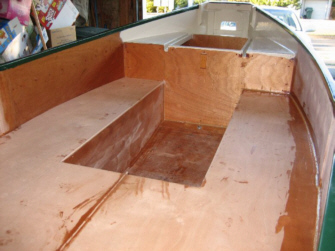
October 2008, finds the flotation foam inserted into the aft compartment spaces. I used ordinary house insulation foam, 2" thick. It is a polyurethane product and should do the job. I began by cutting a cardboard template of the shape of the hull. Knowing that the hull is flat, that shape worked for all pieces inserted vertically to fill the space.
I completed the installation of the seat lids and am nearly completed with the filleting process to seal all seams in the cockpit areas. I also completed the forward hatch and have painted the forward section of the inside areas white, using Rust-o-leum marine paint.
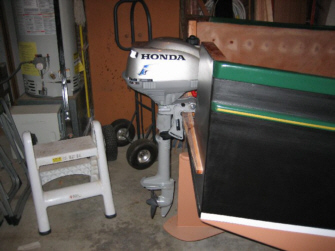
I purchased a new Honda 4 stroke, 2hp motor. It fits the boat nicely with one minor problem. There is no geared reverse on this motor, so reverse is accomplished by spinning the motor 180 degrees. That cannot be done if the rudder is at mid-ships since the blade would chew a nice hole in the rudder! Really folks, this is a 12 ft boat, who needs reverse? The motor will spend most of its time locked in a center position or flipped up out of the water.
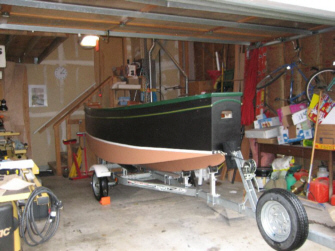
With the winter approaching and temperatures dropping in November 2008, I lost good epoxy temperatures. I lifted my Old Shoe onto its trailer and moved it out to the side yard under cover for another long, cold winter.
There will be no more additions until Spring of 2009. The boat is essentially completed as far as components to make and attachments. What remains to be finished is just final detail work and of course, rigging. We are getting close.
I was amazed as how large she is sitting on that trailer and that she is looking like a real boat! What a sight. I am very pleased with the outcome and very anxious to get her wet and sailing.
Spring 2009 Start-up
May of 2009 finds the boat moved back into the garage. It is now time to finish this project. I am really hoping for a launch sometime in July. Some very exciting news; my boat has been accepted at the Port Townsend Wooden Boat Festival to be held September 11, 12, and 13th of 2009. I plan to show her on her trailer, with sails up, weather permitting. I will also have a story board with pictures of the build and of the boat sailing. I will also be available to answer questions and hopefully be able to urge a new builder to begin that project they have always wanted to do.
The boat has officially been named “Pearl”. I was going to name her “Black Pearl” of “Pirates of the Caribbean” fame, but chickened out. I like the name of “Pearl”. My good friend Mike Keers has generously carved a beautiful name board which will take a place of honor in the cockpit. I have also officially licensed the boat with the State of Washington and have been assigned a builders ID number and license number, all of which have been affixed to the hull in the proper places.
Progress to date has been the completion of filleting the cockpit seam lines and of fiberglass taping all seam lines in the cockpit area in preparation for glassing the seats. Next step is to sand those taped areas prior to laying cloth to the seats. I hope to complete this final glassing task over the next few days. Here is a list of projects yet to be completed before I can actually say the boat is done:
This page was created by oldshoe_1@hotmail.com
May 22, 2009
Rolling the Hull
The Cap Rail

The Hull is Painted and Mast Stepped
Foam Flotation Installed and New Motor
Hull Finishing
As you can see, there is much to be done before I can call this project completed. I can just take each day as it comes and it will, as always, take as long as it takes. Stay tuned, and while you are tuning in, please tun in to the "Rigging the Old Shoe" page for photos and a description of the some of the items on the above list.
Return to This Sailing Page - Home
Return to Solo Publications Web Index