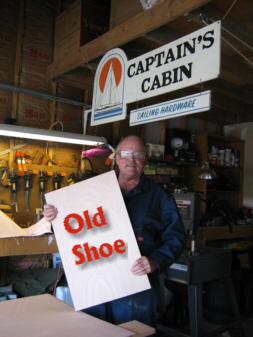
Page 3 - Winter Projects (Winter of 2006-07)
by Dennis Lancaster
On this Page:
On Other Pages on This Site:
The Ballast Plug
Miscellaneous
Spars and Sails
The Rudder
A Tiller to Be...hold
The Ballast Arrives
The Trailer
Site Contents -
The Plans -
The Materials -
Bulkheads -
Keel and Ballast -
Winter Projects -
Mast Fabrication -
Putting The Hull Together -
Deck & Interior Assembly -
Rigging the Old Shoe -
Sailing My Old Shoe -
Boat Building Links
e-mail to: oldshoe_1@hotmail.com
So typical of boat building, there were a few delays in my building schedule, including giving our granddaughter the time of her life at Disneyland. By September 6, 2006, it was back to boat building business.
I thought that my next step would be the strong back, but it was pointed out that now would be a good time to rip out the chine logs and remaining cleats, cap, rub rails and keel sticks while I have the work space.
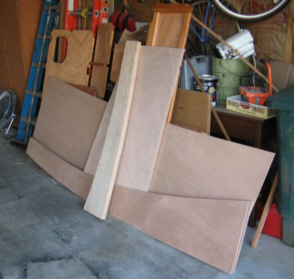
It was also time to loft my side and keel patterns on 4x8 ply sheets and get those pieces out as well. I had a visit from my good friend from east of the mountains. Together we ripped the required sticks from my remaining stock of ľ" x 6" x 12' fine grain fir. Next was the lofting and cutting of my side panel and keel pieces.
I was anxious to get started on the strong back and get those bulkheads mounted. Things began to look like a boat when that happened. Also, winter was beginning to set in the great Northwest and the garage door soon would have to be down.
Due to on-coming winter here in the Pacific Northwest and my desire to retain parking space in my garage for our car, the strong back for the Shoe build was delayed until spring of the next year. In the mean time, I busied myself with building a number of smaller items, such as the rudder, tiller, all spars, etc. This was an accumulation of many pieces that would hopefully come together quickly after the Strong Back was built.
As of Oct. 1, 2006, I had completed the wood plug for my ballast. This is the vertical piece of wood in the photo to the right. I then took the plug to the foundry for lead casting in sand. I have also cut out all my side panels and keel panels.
Winter officially set in early in the North West in mid-October, with blinding snow storms, 80 mph winds, ice and then medical problems with aging parents. I remained busy though, but not highly productive through early 2007. This seems to be my mantra for this time of year.
October proved to be the time for other aspects of the build. I secured a contractor to excavate and lay in crushed limestone in my side yard to create a pad for the Shoe when she is stored on her trailer. The contractor will also build a new gate.
I also continued with the application of PE to my hull sides, I will be starting to build my rudder soon. It was 24 degrees last night…. Oh summer, where are you?
I worked with Edensaw in Port Townsend for my spars. They agreed to provide Sitka Spruce for my masts and other spars. By October 2006, Edensaw was involved in the process of locating, and then milling the wood to my specifications. I decided that I would probably be doing the tapering at a location other than my garage.
As of the end of October, 2006, I was still waiting on Edensaw in Port Townsend for my masts and spar wood. I was never sure why there was a delay, but the company worked with me to get this order filled in a reasonable time frame.
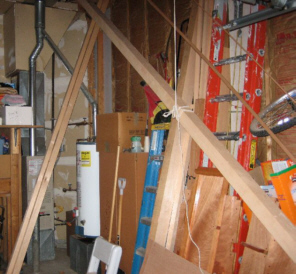
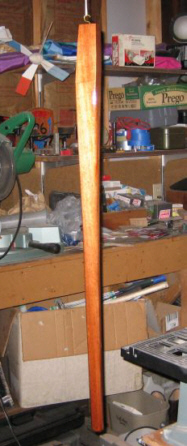
I received the mast and spars in mid-December 2006.The photo on the right above shows the main mast supported at its middle by some rope in my garage. The other spars are vertical, leaning up against the wall.
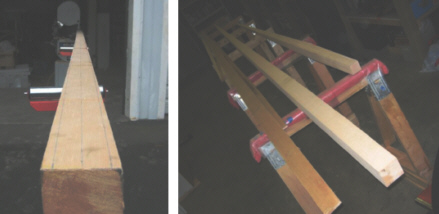
The quality of the Sitka Spruce was top notch. After the spar wood arrived at my garage, I transported it to a friend's shop Anacortes for tapering and finishing.I needed more space and better equipment to make the saw cuts, and my friend's shop proved to be perfect for the task.
The two frame photo to the left shows the mast shaping in progress at my friend's shop in Anacortes.
In February 2007, I found time to get the taper cut in the main and mizzen masts. The centerline and taper were lofted onto the square stock and the taper was cut in using a band saw. I lofted the lines onto two adjacent sides. After the first two sides where cut, I nailed the pieces back onto the mast, turned the stock and made my second cut.
By the third week in February, we were ready to concentrate on fairing the tapered sticks. The lines for shaping the masts to octagon were drawn on using a standard taper gauge I built for this pupose. Wood will be removed by draw knife and hand plane. I decided to leave the masts octagon, rather than round them. From the partners down they will be left square, but tapered to the base as per the plans.
The old salt in the photo to the right is my good friend and skilled shipwright, Lance.
In October 2006, I ordered my sails from Duckworks Boating Supplies in Texas: http://www.duckworksbbs.com/contact.htm
Duckworks Boating Supplies are wonderful folks to deal with. They gave me the best prices, and I feel confident that my sails will be well made. I ordered a very dark shade of Tanbark, almost a chocolate in color, at least until light shines through it, then it appears to be a very dark red.
During the first week of December 2006, my sails arrived from Duckworks Boating Supplies. I am satisfied with these sails and am anxious to see how they will work when the boat is completed.
As of Dec. 13, 2006, I had cut out the pieces for the rudder. I ordered a Rock Hard Maple 1 -1/2" dia. X 36" dowel on-line from Premier Wood Products, Inc. located in Statesville, North Carolina: www.premierwood.com.
The dowel arrived during the first week of December. It was perfect for my rudder shaft. All that remained was to cut in the 3 degee bevels on one end, coat all of the pieces with penetrating epox, and then final assembly. Research brought out a modification to the rudder which I will incorporate and explain later on this page. (see pic)

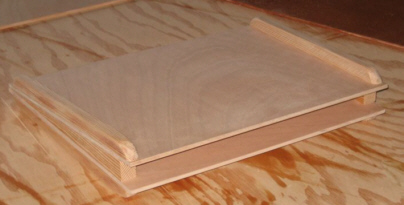
The photo to the right above is of the rudder dry assembled. The rudder has “fins”, it is hollow, and it is missing the rudder shaft. There will be a larger fin attached to the bottom of the rudder when it is complete. These fins help water flow coming off the rudder, directing it back instead of spilling off the sides.
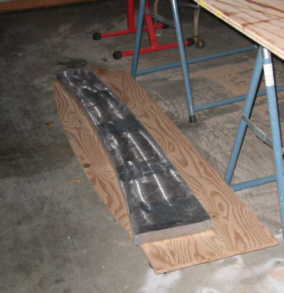
Storms continued to rage in the North West. I spent the following summer building the hull, As that summer turned to Autumn, and the hull was nearing completion, I devoted some energy to completing the rudder. In the photo to the left the rudder is assembled and nearly ready to install: Just one more coat of Interlux 1-part Polyurethane and the rudder will be complete
I purchased a nice plank of Iroko for my motor mount. A friend gave me a beautiful hunk of mahogany that will make a nice tiller.
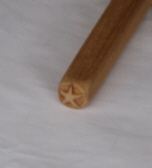
The photos to the right and left show my new tiller. I completed getting the right shape out of a solid stick of nice mahogany and decided to be somewhat creative and carved a star into the tapered end of the tiller.
I think it's a nice touch and not bad for a first crack at carving. My tool of choice was a box knife. I applied one coat of penetrating epoxy and then began the long process of applying spar varnish. I will do a total of 13 coats before I call it done. The picture is of coat number three.
I have also applied penetrating epoxy to both sides of my keel panels. With this cold weather, it takes one week for each coat to kick. I am not heating my garage, but do use heat lamps when I am working.
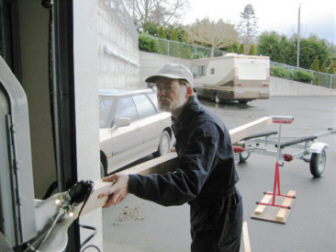
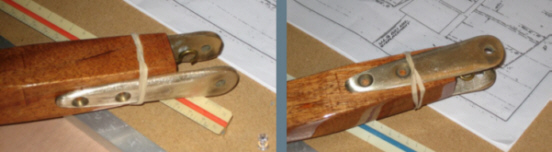
Sometimes it pays off to shop the Marine Consignment stores. I was on the search for a proper Tiller Fork for the "Shoe" and came across two identical bronze chain plates. They were small and must have been used on a small sailboat. They seemed to have sufficient material to possibly serve as a tiller fork, so I paid $10 and snapped them up. Much to my pleasant surprise, they fit perfectly and I think as you look at the pictures, you will agree that they will work fine.
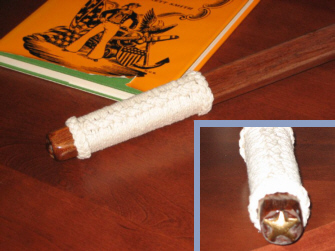
My First Mate did a wonderful job of Marlinspike. This fancy rope work is called 3-strand Cockscomb. I painted the star on one end of the tiller with Liquid Gold Leaf.
To see the tiller as mounted on my Old Shoe, please see: the "Rigging the Old Shoe" page.
My lead ballast had been cast by Union Foundry here in Bellingham, Wash. The casting was completed by the end of October.
The picture to the right shows the ballast laying on its rolling platform. Over 200lbs of dead weight is very heavy and its nice to be able to move it around when needed.
Due to the release mold bevels that I had to add to the wood mold, my finished weight came in at 216lbs. These bevels are slight and will have no affect in the fabrication of my keel section. I actually like the idea of a few extra pounds of ballast and doubt that 16lbs is going to make a big difference in the performance of the boat.
Something else I discovered, lead is indeed soft and when two people pickup the ballast, one on each end, the lead actually takes a bend, which relieves itself when the ballast is set down on a solid flat surface.
By November 20, 2006 I had placed an order for my new trailer from King Trailers, Inc. based in Marysville, WA. www.kingtrailers.com I selected model KB1210. With a few modifications, this trailer should work just fine. I looked into having a trailer built custom, but the costs far exceeded what I could purchase new. Weather has delayed the installation of a new pad on my side yard to store the boat and trailer. It continues to rain in the Pacific Northwest.
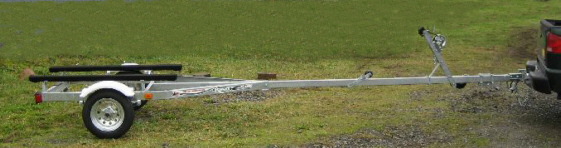
My trailer arrived in December 2006. I was pleased with the quality of workmanship. It will be perfect for hauling my Old Shoe.
This page was created by Solo Publications for oldshoe_1@hotmail.com
Return to This Sailing Page -Home
Return to Solo Publications Web Index
May 31, 2007