
Page 2 - Construction Begins
by Dennis Lancaster
On this Page:
On Other Pages on This Site:
Bulkheads
Site Contents
The Plans -
The Materials -
Bulkheads -
Keel and Ballast -
Winter Projects -
Mast Fabrication -
Putting The Hull Together -
Deck & Interior Assembly -
Rigging the Old Shoe -
Sailing My Old Shoe -
Boat Building Links
e-mail to: oldshoe_1@hotmail.com
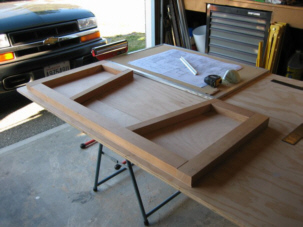
This effort began in early August 2006. By August 8th, the forward and stern transom bulkheads and bulkhead "A" had been "kitted". The plans and instructions do not state how wide to cut the cleats for either the bow and stern transom bulkheads. I placed a scale rule on the plans and estimated the width shown to be 2-1/2". So I ripped my cleat stock for those bulkheads at 1-1/2" x 2-1/2' from clear grain fir. The transom bulkhead proved to be a challenge due to the angles that needed to be cut. The design is very robust.
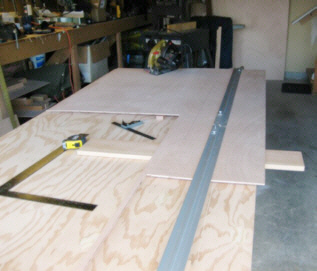
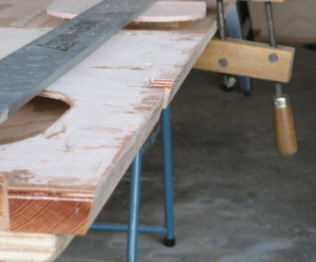
As of 8/11/06, plywood for bulkheads "B", "C" and "D" were cut. I found this project to be very time consuming. I checked my measurements at least 3 to 4 times before making the cuts. The plywood was positioned on the worktable with wood sticks as standoffs so that I didn't cut into the table.
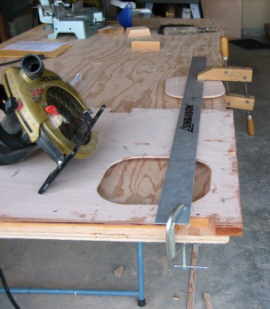
For long cuts, I clamped down a straight edge for the Skill saw to ride against. This required more careful measurement to insure that my cut would be slightly proud of the line. I found my block plane to be an essential tool in cleaning up my edges. Be sure it is sharp. It took 3 hours to cut 3 bulkhead panels. Is this normal? Well then, what's the hurry? This is supposed to be a fun "down time" project for me. The photo to the right is of bulkhead "D", clamped, on stand-off's and ready to cut. Next will come the "clinker" cutting to complete the bulkhead "kits".
All bulkheads were cut and "dry" assembled. I took the time to letter code all corners of each cleat piece as each bulkhead was dissembled, glued and re-assembled, so that I would be able to put the pieces back together the same way. I also identified my centerline for each bulkhead. I glued my first two bulkheads on August 20, 2006, starting with the bow transom and ending with bulkhead "A". Each bulkhead was taken apart and a coat of epoxy was applied to every bonding surface. I then mixed up a thickened batch using colloidal silica and applied that to just the ply panel in the bonding areas. This "gluing" process is a messy job and I felt like a kid with finger paints and very sticky fingers. The cleats were then screwed down into their permanent positions. Clamps and weights were applied as needed.
A note about epoxy work: I am a novice at this part also. I have done some reading out of the West System Technical Manual and Product Guide and have been counseled by others who have done it before. The principle of mixing and application will pretty much stay the same if you want success. How we each set up our workstations might very. I like what I have done. My main source of material comes out of one-gallon cans. I transferred the appropriate amount out of each can with a separate plastic measuring cup and combined the resin and activator in a cup labeled with a scale. Each measuring cup was then placed in a separate container with a lid to store for later work. I used a small measuring spoon to ladle out the Silica. That spoon was stored in its tub. I used disposable "chip" brushes as applicators.
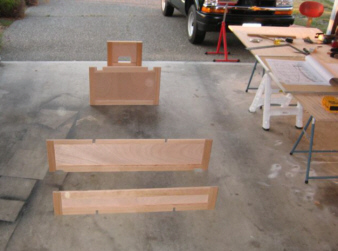
As of 8-27-06, all bulkheads were disassembled, epoxy glued and re-assembled. Five of the six bulkheads had bevels cut on the perimeter edges. I used my table saw for the bow transom and my skill saw for the remaining bulkheads with exception of the stern transom. I thought that I was paying attention to the orientation and direction of the bevels, but managed to cut the top bevel on the bow transom backwards. Fortunately, the cut was clean and I was able to re-attach that cut piece with epoxy. I was nervous about using my skill saw to make bevel cuts, but found that with careful measurements and a good straight edge, my cuts came out straight and clean.
The only angle gauge that I feel I can trust is the one on my compound miter saw. To check my angles, I made cuts of the various angles I would need from scrap 2x4 material. I would present these angles to my saw blade to insure I was going to get a correct cut. I then double-checked my bevels with my angle tool. I wish to make any future builder of the "Oldshoe" aware of a mistake that I made unknowingly. When building bulkheads "B" and "D", I decided to go ahead, and I attached the cleats that the seat sides will be attached to. These cleats were mounted to the plywood side opposite the framing cleats. It was only after these were solidly glued in place that I found that they essentially prevented me from using either my table saw or my skill to make the bottom edge bevels. I resorted to using my 6" Jointer to slowly work off the material at the prescribed angle. Lesson learned; it is important not to jump ahead during assembly.
Once again I found this gluing and beveling to be a long and exacting process. I was recharged after every building session as I began to see shapes develop out of what was originally a stack of wood: All done with my own hands.
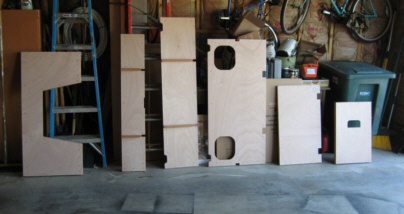
The step to follow would be finishing cuts, such as corner notches and beveling those notches, some sanding and then application of penetrating epoxy. After that I would tackle the Strong Back.
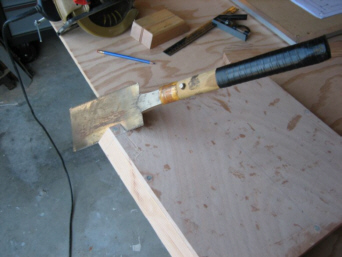
By 9-01-06, two bulkheads had been bevel notched. No one prepared me for this experience. First I had to find the right kind of cutting tool. I chanced upon a Japanese Ryoba Saw. This saw made nice fine cuts and did very well. It was a bit difficult getting used to and keeping it under control. It was recommended that I use a Back Saw or "Gent's Saw" to make those bevel notches. I think this is the only way to go: cut the corner notches in after beveling of the bulkheads is completed.
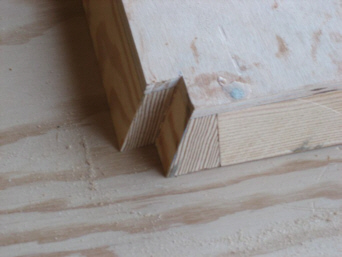
I was reminded of one thing "after the fact": The plywood on both the bow transom and stern transom does not get notched. In fact, those notches should have been cut on the cleats before they were attached to the ply and the bulkheads were beveled. I'm not sure how it would have gone to cut the bevel into those notches… it was all very confusing. But I understand that this is proper shipbuilding procedure. I'm not going to worry about it, as I plan to fill and fair those notches after the chine logs are mounted and then those corners will be fiber glassed over in any case. The project requires much attention to detail. At this stage I wondered if I was ever going to finish this project? I was having fun though.
This page was created by Solo Publicatiosn for oldshoe_1@hotmail.com
May 31, 2007
 The first step in the process was cutting out "kits" for each bulkhead prior to coating the parts with penetrating epoxy and assembling of the "cleats" to the plywood bulkhead panels.
Return to This Sailing Page -Home
Return to Solo Publications Web Index